By sound-designer and composer, Anders Bau, 2023
Using only Abletons instrument rack, a few instances of simpler and a bunch of free single cycle waveforms from adventurekid.se: http://www.adventurekid.se/AKRTfiles/AKWF/AKWF.zip
Start by downloading the file from Adventurekid on the link above (donate, if you like). Unzip it to your library of choice.
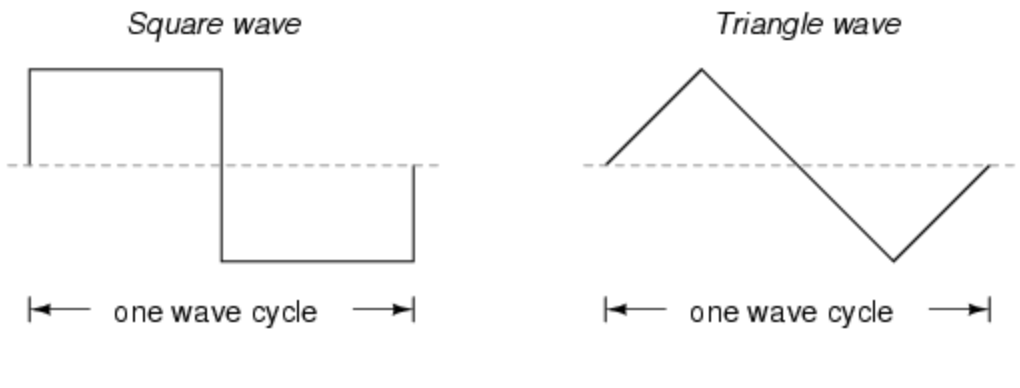
A single cycle waveform, is a sample of a waveform that only runs through its cycle once – sample start and sample end are ending at the same amplitude, making it seamless and endless loop-able.
When played back non-looped, it just makes a “click” or a “pop”.
These single cycle waveforms are ideal to help us build our virtual analogue synthesizer, as we get pure sine, square, triangle and saw – they are small, cpu and hard-drive effective, AND combined with the instrument rack, you don´t have to be limited to those standard 2 or 3 oscillators in most synths. The only parameter we are going to miss, are the pulse-width for the square wave.
So, how do we do it then? Let´s get started!
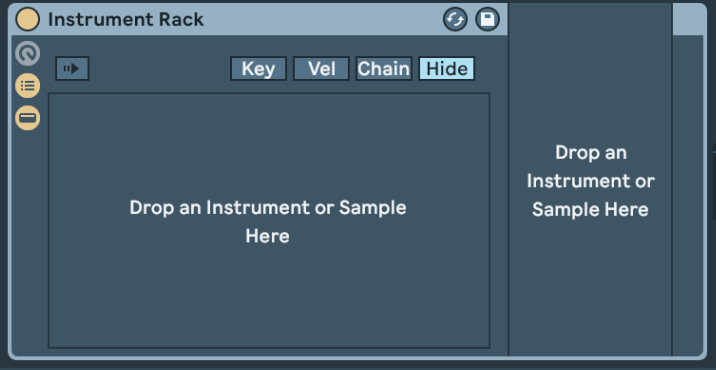
Insert an empty “instrument rack” on a midi track.
Click the “view chain list” button, right click in the main area and create 3 chains.
Right-click on each chain, and rename to OSC 1, 2 and 3. Drag a “simpler” from the instrument browser, to each of the chains. It should now look like this:

Getting the picture of “unlimited” oscillators? You just keep adding the chains that you need. And unlike nearly any other VA synth out there, you can make velocity switches, set up note-ranges and crossfades (in the “key”, “chain” and “vel” tabs), pans, volumes and additional effects on each of these chains .
We´ll start making a saw-pad, so let´s set up the single cycle waves according to that goal.
Select OSC 1 and drop the “AKWF_saw.wav” from the folder “AKWF_bw_perfectwaves” in the field that says “Drop Sample Here” (remember to place those single cycles somewhere permanent on your computers harddrive – if you move them later, all of your sweet sound-design will be a total mess).
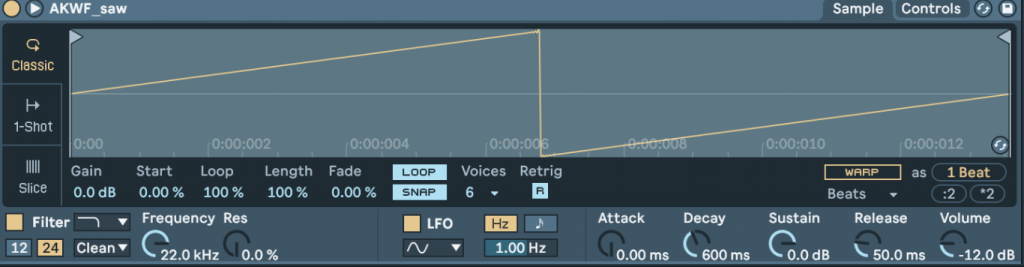
Be sure that WARP is off, Classic loop mode selected and turn on LOOP (just above SNAP). Set “Voices” to 32. That´ll give you 32 notes of polyphony.
You should have a clean and endless saw wave sounding, when you play your keyboard.
Adjust the filter to taste. The 24db cutoff-mode gives a more steep and effective slope, while the 12db option is more soft.
Now, click on the “Controls” tab in the upper right corner of simpler – this will change the view to this:
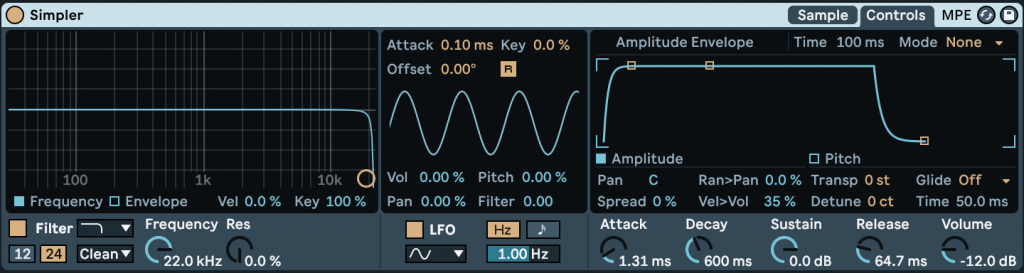
The Amplitude Envelope (“TVA” in common synthesist terms = Time Variable Amplifier) is used to adjust the attack, decay, sustain and release time of the sound.
Since we are making a pad-style sound, we will want a fairly long attack (adjust to taste) – and a release that makes the sound hang over (and fade slowly) when we release our midi note (try to start around 5 – 6 seconds).
We want to make the padsound as thick as possible, so we are going to copy this instance of simpler to the next chain (Osc2). On the first oscillator, set the pan (under the amp. envelope) somewhere to the left – and Detune to -8 ct. Then do the opposite on oscillator two: pan to the right, and Detune +8 ct.
Voila! Your first padsound with your single-cycle, multi-simpler Virtual Analog Synth.
Now try to experiment with more oscillators, different settings, adding LFO to change pitch, filter or amp. Random panning, etc!